Refinishing Oak Kitchen Cabinets Easiest Way
Refinishing kitchen cabinets the best and easiest way normally does not happen. Well it does refinishing Solid Oak kitchen cabinets and cupboards.
Another painting tip I've discovered here in Denver I would like to share with all. Being in business providing professional painting services for Denver Metro Area and Colorado for over 30 years, I took on a painting project in my own personal home last year, reveling what I have learned thus far.
Today, the cabinets, cupboards look just as good as the day I did this, so here we go.

Before we get into the best and easiest way refinishing kitchen cabinets, our Oak kitchen cabinets were not any different than most others in a middle income suburb home, with a family of four using them on a daily basis.
Oak kitchen cabinets were approximately 15 years old, having a deep Oak stain and Satin lacquered finish. Over time this lacquered finish became dull and dried out, especially around heavy trafficked cabinet drawers and doors.
Cleaning kitchen cabinets on a regular basis, this cleaning also took it's toll upon the kitchen cabinet finish. Knowing that I had to do something, as kitchen cabinets and cupboards were looking quite tired from a typical family. I had previously used this product sealing interior windows up in the Foothills of the Rockies for a commercial client, I said what the heck. I'll try one small area, and if I'm satisfied with the results, I'll do the entire cupboard door.
Being a year later, and no visible wear with normal wiping down dust, grease, and occasional food splatters, below is my discovery.
First, you will want to clean your kitchen cabinetry like there's no tomorrow.
Cleaning Kitchen Cabinets

Cleaning kitchen cabinets properly is by far one of the most important things you can do starting this painting project off on the right foot. Knowing we are very clean individuals, any minor drippings from the sink area, grease from the kitchen stove, dust from the flour making chicken and dumplings the night before, all of this needs to be as clean as a whistle. You can clean drawer fronts and doors as they come off.
Remembering to use a piece of masking tape, writing on each piece of tape numbering where each goes back. Once you've removed the hardware of each, it is time for the cleaning kitchen cabinets.
If you ever inspect something close up, it should be the cleaned cupboards and cabinets. Using a mild detergent, warm water, clean rags, and lots of elbow grease, your kitchen cabinetry will be ready for painting once dried.
Would go as far as using a toothbrush dipping in soapy water, scrubbing into cracks and crevices where moldings meet at 90 degree angles. A very good cleaner that cuts grease not leaving a residue we use is called Greased Lightening. Greased Lightening can be found in gallon containers at your local hardware stores.
Once dried, preferably overnight, your closer being ready to start the re-finishing process for your stained and worn lacquered cabinets and cupboards.
Essential Tools and Materials for Re-finishing Kitchen Cabinets and Cupboards
Here's everything you'll need to get it right the first time, many items you may already have.
| Sikkens Door and Window | Cans and Jars |
| Latex brushes for water, natural for oil (alkyd) | 2-3" Brushes for Cutting In |
| 4-5" Brushes for Cabinet Doors | 1" Brushes for Frames |
| Rollers and Roller Covers (various sizes) | Rags |
| Paint Trays and Liners | Drop Cloths |
| Regular Masking Tape (narrow and wide) | Masking materials |
| Blue / Green Masking Tape (narrow and wide) | Stir Sticks |
| Buckets and roller grids | Razor Knives |
| Screwdrivers - Phillips - Flathead | Xylene |
| Mineral Spirits | 5 - Way Painter's Tool |
| Jap Dry | Wood Filler and Putty |
| VM&P | Denatured Ethyl Alcohol |
Refinishing Kitchen Cabinets
Refinishing kitchen cabinets and spraying stains and lacquers is the very reason most people tend to look for another painting career. These paint products are very toxic, as well as the V.O.C's (volatile odor contents) also allowing for very quick flash points, causing explosions and subsequently fires.
Any suggestion obtaining better results from actually spraying these chemicals is a good thing. And in my book a more Greener thing. Using any products, careful attention following the manufactures directions is always best.
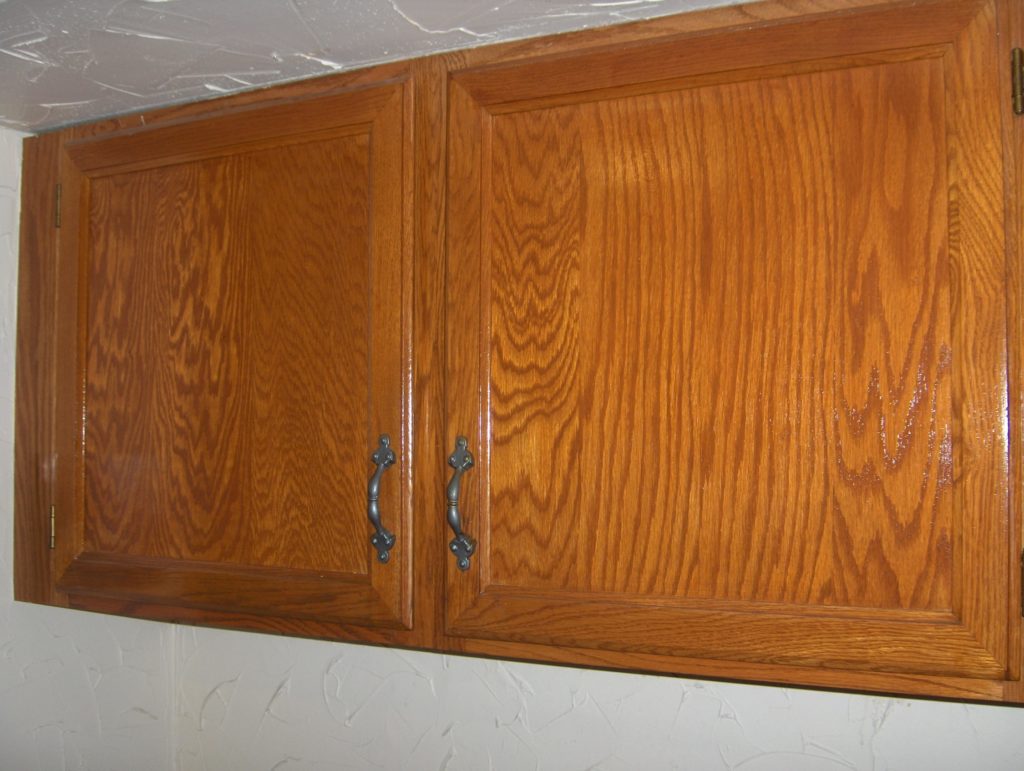
With that out of the way, as you can see, these cabinets look brand new. Actually even better than the day we bought our home, having a Santa-Fe skip trowel wall and ceiling texture we can talk about at a latter time. I left the cabinet doors shut, not wishing to view the Cheerios and Granola bars inside. 😆 Seriously wanted to show the kitchen cabinet doors above our buffet.
Any way, I refinished all the kitchen cabinets in our home, taking approximately 2-3 hours to clean immaculate before hand. 1-2 hours removing hardware, laying doors and drawers out to put back in same spots. 1-2 hours brushing out all kitchen cabinet surfaces 2 days in a row, replacing door hardware and cabinetry doors and drawers taking 1-2 hours, for a total of 5-9 hours total.
Did not have to wear a respirator with charcoal filter, although keeping the area well ventilated, not having to clean up a sprayer either, making this the best and easiest and best kitchen cabinet refinishing project I've ever done, using my own kitchen as the test. You can read more Paint Kitchen Cabinets Correctly, going into detail with painting tips, kitchen paint colors, painting tools, and painting techniques.
With this type of kitchen cabinet refinishing more specialized having Solid Oak kitchen cabinets, I hope this will be a benefit to you. Saving money and time, updating your kitchen cabinets what it would cost hundreds of dollars, only a few.
Sikkens Cetol Door and Window

Sikkens Cetol Door and Window is a superior Clear finish that bonds seals and protects faded worn kitchen cabinets, as well as windows and doors. Should be hand brushed, using a high quality Chinese bristle brush.
Brushing this product requires some fiance, as you do not want to get in a hurry. Using a 3-4" Oil brush will speed up the brushing, as you take your time, making this all even. Must keep a wet edge, brushing several times, long strokes, 2-3 times in each spot, working it in.
Better to go two light coats than one heavy, as this product tends to sag, not drying very quickly. Best to reevaluate your work 15-20 minutes after you have brushed a certain area, catching any sags with a quick light brush stroke, for a professional kitchen cabinet refinishing project.
House Painting in Denver
House painting in Denver always keeping the painting customer in mind, saving the customer time and money, providing professional house painting services throughout Denver Front Range and Colorado by one of Denver's leading painting contractors. Specializing in complete interior and exterior painting services for homes and offices in Colorado.
I hope you've enjoyed this refinishing kitchen cabinet painting tips. Comment below, letting me know what you think.